NARG development – Using ScriptableObjects for weapons and armors
I have started a new project in an area that is out of my comfort zone. I am developing my first video-game for the PS4, codename NARG. Today I am going to talk about Scriptable Objects.
ScriptableObjects are just data containers, but with them one is able to edit and manipulate them in Unity’s inspector.
I am going to have a wide catalogue of weapons and armors. The weapons are going to have a certain type of attack: blunt, slash or ranged. The armors on the other side are going to have a resistance to every kind of attack, which will be ranked Low, Med, Strong or Super.
Let’s write it all down inside classes.
// Weapon.cs
using UnityEngine;

public class Weapon : ScriptableObject {

    // Enums
    public enum WeaponType { Blunt, Slash, Ranged };

    // Attributes
    public WeaponType type;
}
// Armor.cs
using UnityEngine;

public class Armor : ScriptableObject {

    // Enums
    public enum Defense { Low, Med, High, Super };

    // Attributes
    public Defense blunt, slash, ranged;
}
We have defined an attribute for the weapons to decide the type of attack that it will have.
We have also defined 3 attributes on the Armor class. These will define what its resistance is to every tyre of attack.
Finally we also moved the enums inside the classes. Semantically they make sense to live there.
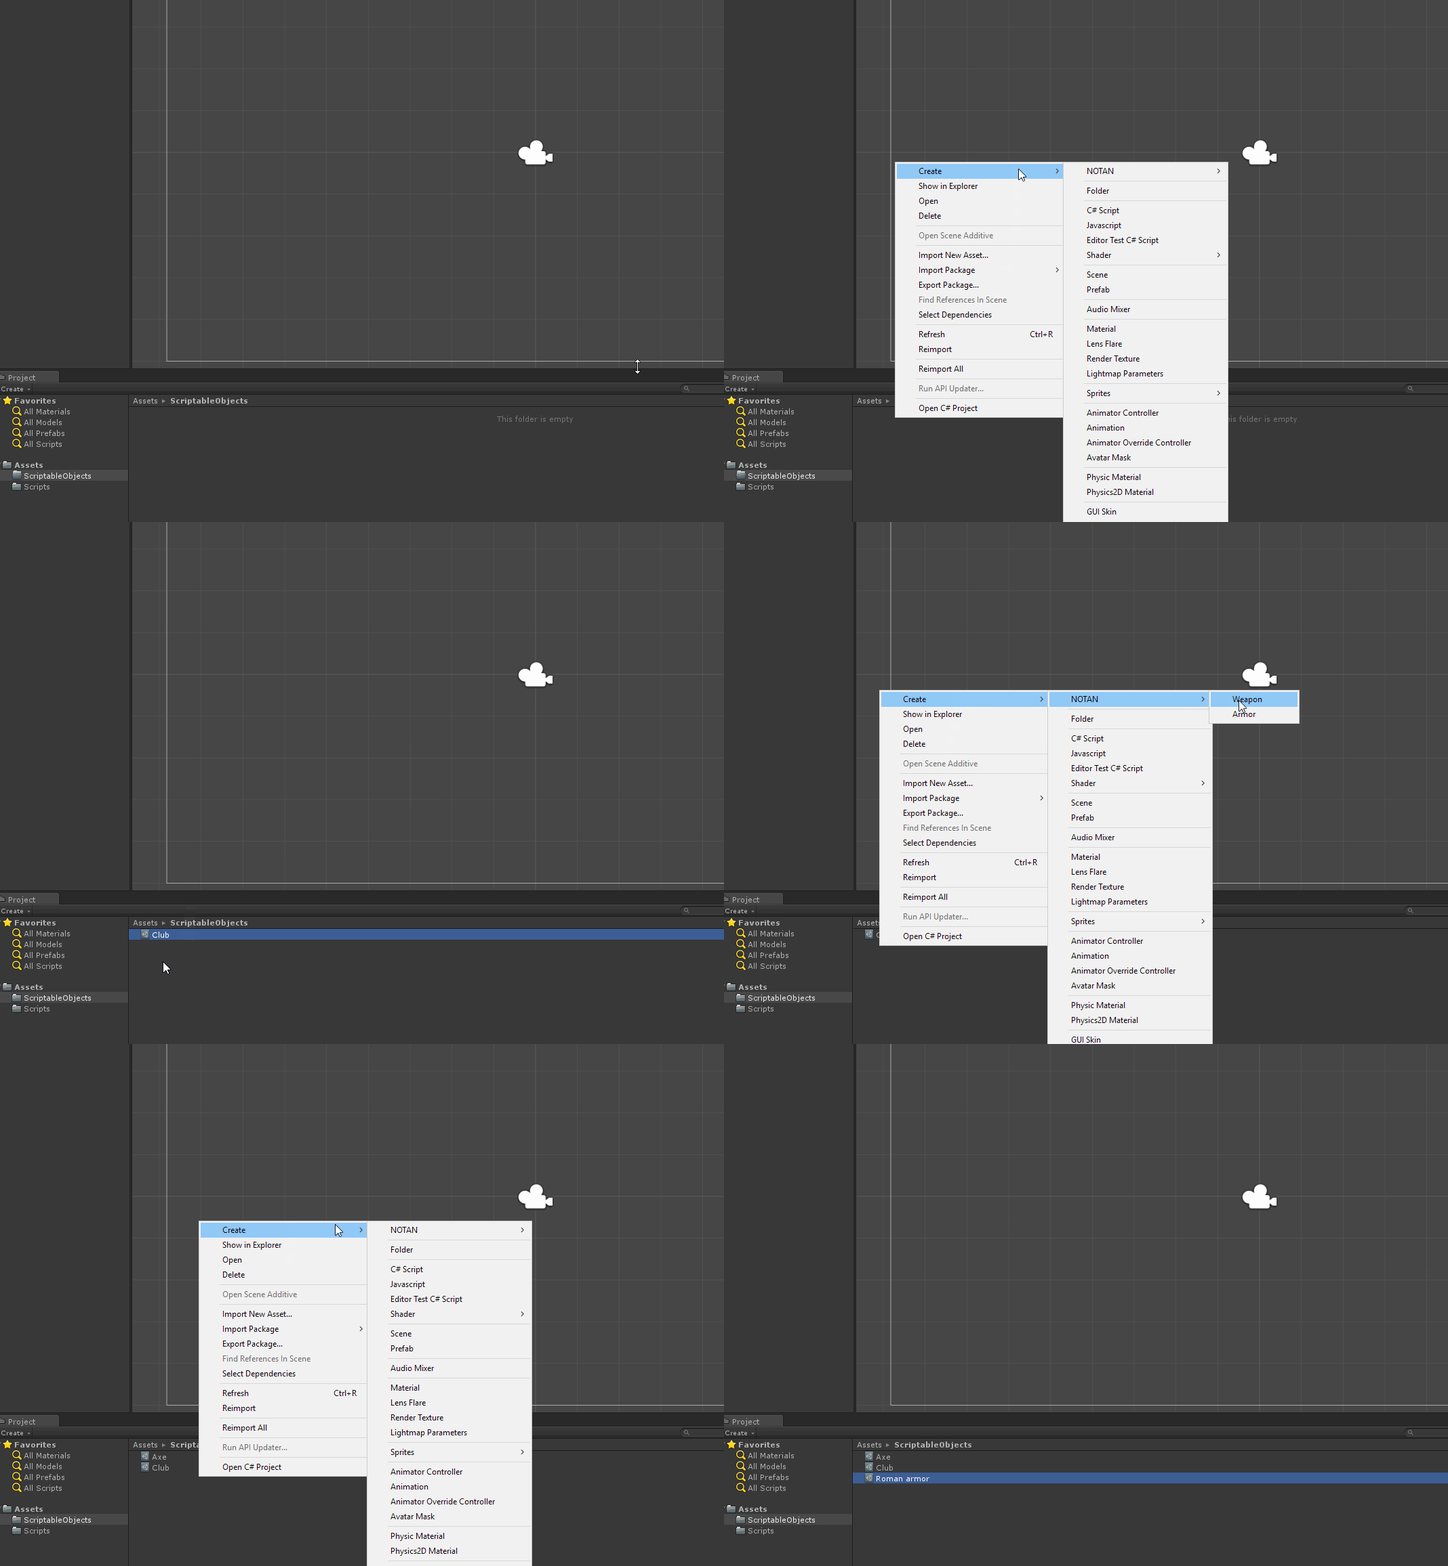
Now that our data structures are defined, let’s see how can we create them in Unity. We will aim to create an entry in the menu bar that allows us to create new instances of our classes. To achieve this, we will add the following directive on top of each class:
[CreateAssetMenu(fileName = "Armor", menuName = "NOTAN/Armor", order = 1)]
The first attribute is the class name that will be used to create the Scriptable Object. The second attribute will be the path that will be created to achieve such instance. The last parameter is the position that this element will take inside the menu.
Now let’s take a look at our finished classes.
// Weapon.cs
using UnityEngine;

[CreateAssetMenu(fileName = "Weapon", menuName = "NOTAN/Weapon", order = 1)]
public class Weapon : ScriptableObject {

    // Enums
    public enum WeaponType { Blunt, Slash, Ranged };

    // Attributes
    public WeaponType type;
}
// Armor.cs
using UnityEngine;

[CreateAssetMenu(fileName = "Armor", menuName = "NOTAN/Armor", order = 2)]
public class Armor : ScriptableObject {

    // Enums
    public enum Defense { Low, Med, High, Super };

    // Attributes
    public Defense blunt, slash, ranged;
}
With this, our scriptable object is finished. If we try to create a new element inside one of our project’s folder, we will encounter the following menu.

Wonderful! Now we can create object with scripts attached to them. This will make them much easier to manipulate and use, thanks to Unity’s inspector.
How does it look in the inspector, you ask me? Well, let’s take a look.

Now we can change the properties of our gear without even having to touch any code. And we can easily assign our gear to another Unity scripts as simple parameters.
Jan 7, 2017

